This guide will help you install the necessary tools on your computer.
We are going to install all the required applications for the local computer.
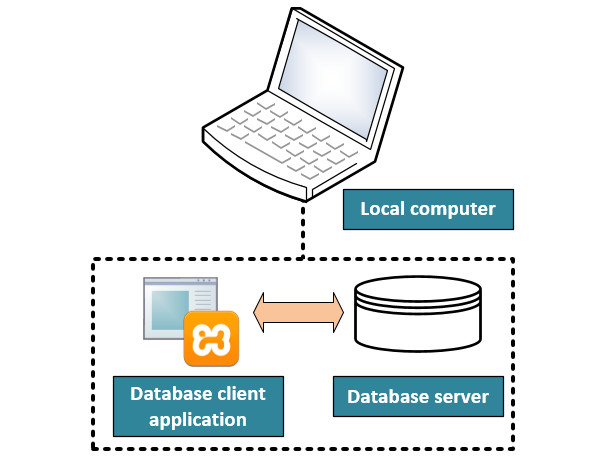
Below is a presentation of the environment.
Two applications will be required:
Database server: Service which includes DBMS (Database management system) and the actual database.
Database client application: Establishes connection to the database server. This application is used for designing a database and executing queries to database.
You can choose your environment and applicable tools freely.
This guide will help you to install the following applications to your computer:
Run the installer and finish the installation of the package.
You should now have XAMPP Control Panel installed. Open it and the window similar to example below (picture taken from Windows environment) will be opened on your screen.
Now start the MySQL service with Start button.
There should now be green background on MySQL module text, PID (Process ID) added for the service and default port 3306 opened (This port can be changed with Config button and choosing my.ini).
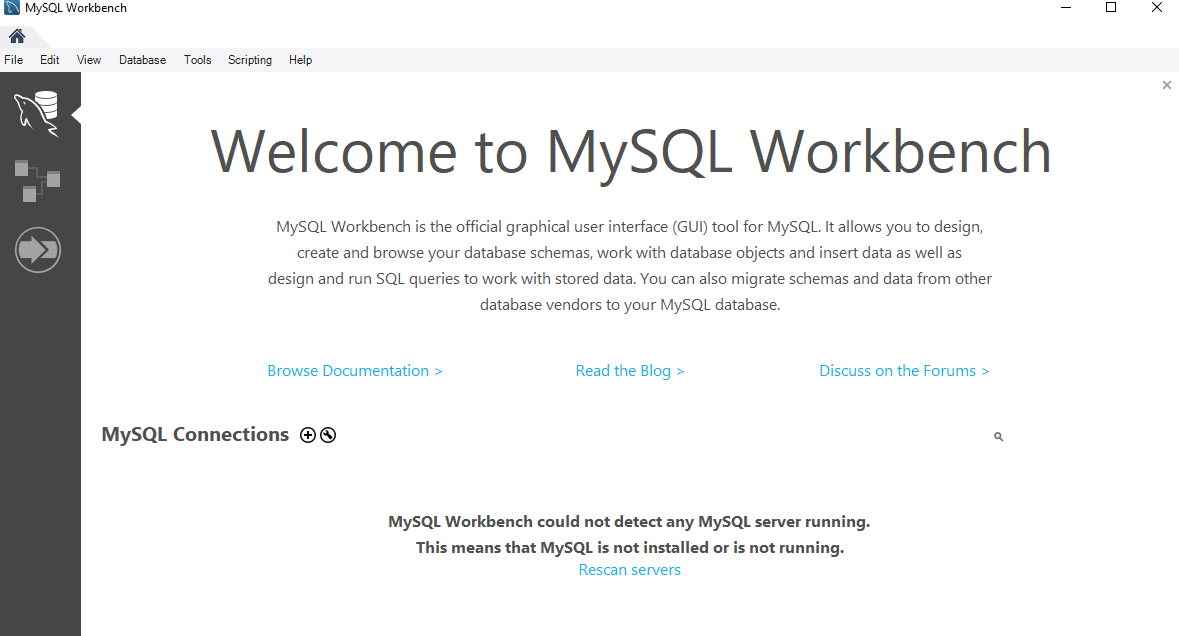
In this phase you are going to establish a connection to your database server with MySQL Workbench.
First click the Setup New Connection icon from the front page ().
Give your new connection the name you prefer (can be any name).
Connection Method should be Standard (TCP/IP)
Use the following connection parameters:
Hostname: 127.0.0.1
Port: 3306
Username: root
Verify that your connection is working by clicking Test Connection button. If you get version related Connection Warning message click Continue Anyway.
If connection is working properly, click OK to save settings.
You can now open the newly created connection by double clicking its name.
Now that you have successfully connected to your localhost database, the configuration of exercise database will be the next step.
Download the Northwind exercise database here to your computer.
Open new script window with Ctrl + t key combination.
Type the following command to create a new database called exercise: create database exercise;.
Run the command with Ctrl + Enter key combination.
You should see a message in the Action window below indicating that 1 row was affected with the command (this means that database was successfully created).
Now click Schemas tab on the left from Navigator window and click the refresh button ()
Import the content of Northwind training database by clicking on Administration tab from the Navigator window, then select Data Import/Restore option and use the settings listed below:
Click Import from Self-Contained File and choose the northwind-db.sql file from your computers disk.
Choose your exercise database for Default Target Schema drop down field.
Finally, choose Start Import.
Important: If password is asked, leave it empty since root user does not have password set by default in XAMPP environment!
Check that there were no errors during the import.
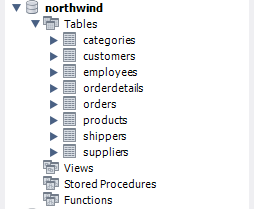
Verify that all necessary tables are transferred to your database by selecting Schemas tab from Navigator window, click the refresh button and open Tables under your database name (see picture below).
Next, ensure that data has been transferred to tables. Right click on exercise database and select Set as Default Schema or double click the name of the database. Name will become bolded indicating that all queries executed from script window will be targeted to this database.
Run the following command for each table to make sure all the data is included: SELECT count(*) FROM table_name; where table_name is the name of the table.
Below are the row counts for each table as a reference:
categories (11 rows)
customers (96 rows)
employees (15 rows)
orderdetails (728 rows)
orders (231 rows)
products (94 rows)
shippers (6 rows)
suppliers (44 rows)
So for example, by running the query SELECT count(*) FROM categories; you should get 11 rows returned.
Now this database can be used for all course exercises from here on!

 ).
). )
)